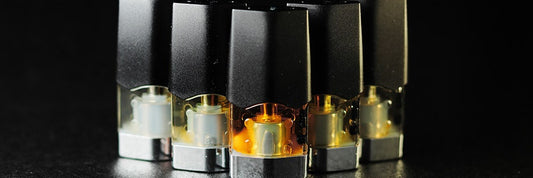

Maintaining a clean and well-functioning vape tank is essential to ensuring smooth, flavourful vaping experiences. In this guide we'll provide you with all the information you need to keep your vape tank in tip-top shape. We'll explain how to clean your vape tank, as well as how to deal with common issues such as leaking, a flooded tank and getting a burnt taste. With some simple maintenance steps, your vape kit will remain in working order for years to come.
Why you should keep your vape tanks clean
Vapers should keep their vape tanks clean in order to avoid residue build-up that could impair their features and flavours. Over time, residue can build up inside the tank from E-Liquid, which can cause clogging and other problems. This residue can also block airflow and alter the taste of your favourite vape juices. Cleaning your vape tank regularly helps ensure that it will remain in working order and that your vaping experience remains enjoyable. A weekly clean-out is the best way to keep your vape tank free from residue. This will help to preserve its features, keep it running at peak performance and ensure you get the best flavour from your E-Liquid.
How you should keep your vape tank clean
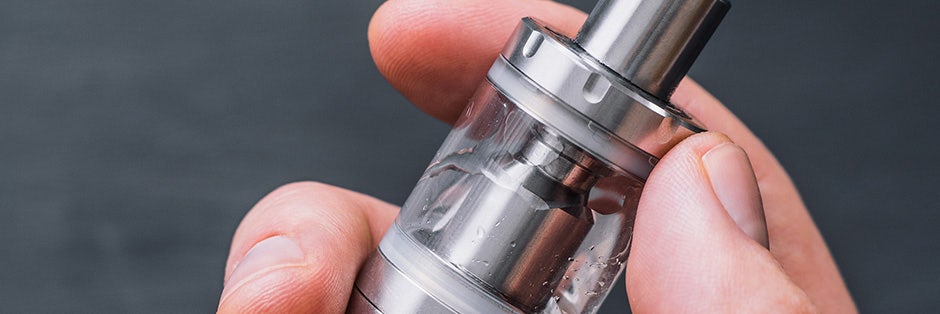
Keeping your vape tank clean is essential for optimal performance and flavour but don't worry, it couldn't be simpler! Here are some steps to help you keep your vape tank in tip-top shape:
1. Disassemble Your Vape Kit - Remove the tank from your mod and make sure to pour out any remaining E-Liquid.2. Clean the Tank - For a quick clean when you're simply swapping out flavours, run the tank under warm water for a minute. For a deeper clean then soak the tank in a bowl of warm water for a few minutes - try adding a few drops of washing liquid if the gunk is particularly stubborn!3. Rinse & Dry: Use warm water to completely rinse off all traces of residue, then leave to air dry. If you used a dash of washing liquid to clean, then make sure your tank is thoroughly rinsed before allowing to dry.4. Reassemble your vape kit - as a final step use a cotton bud on your tank to make sure there's no residual water left. Any excess moisture introduced to your device could potentially cause a hazard (don't forget your vape is an electrical device) or shorten the lifespan of your components.
For more information on how to clean your coil, check out our earlier article on cleaning coils!
Dealing with common vape tank problems
Unfortunately, sometimes even the best-maintained vape kit can run into issues. Here are some tips on how to deal with common problems you might face:
Leaking Tanks:
This is often caused by overfilling your tank or overtightening the tank onto the mod. To fix this issue, make sure you don't overfill the tank and that you only tighten the tank onto the mod until it clicks. Check if your tank has O-rings, these simple little pieces are designed to minimize leakage (although not all tanks come with them) - ensure it's sat flush when you tighten your tank and that it's not damaged. Another option is it could be your E-Liquid is too thin for your tank, try using a higher VG E-Liquid or a 50/50 ratio to see if this helps.
Flooded Tanks:
This occurs when too much juice is drawn into your coil, causing a gurgling sound and potentially disrupting flavour. To fix this issue, start by cleaning out your E-tank to get rid of any excess juice and then check if the coil is gunked up - you can clean any excess residue from your coil with warm water. Then adjust your wattage down, this should help give you a better vapour production and reduce flooding.
Burnt Taste:
This often occurs when your coils are burnt out due to overheating, your coils are gunked up from residue or even that you didn't allow enough time for your wicking material to soak up the vape juice. To fix this issue, first allow for five to ten minutes to ensure your coil and cotton have soaked up enough E-Liquid, before firing up. If the problem continues, check your coil to see if it's covered in gunk - this might mean you need to clean your tank and coil or replace the coil altogether.
Error messages on your vape kit:
Those with fancier devices with digital readouts may sometimes encounter errors such as 'no atomiser' in regards to your coil. And more often than not, the chances are you do have a coil attached. If you do get this message, simply removing and putting them back on can sometimes solve the issue - make sure the tank is firmly attached. Otherwise, remove the tank and coil, and clean the coils and the connector before replacing them. If this still doesn't work, you may need to replace it with a new coil.
A happy tank is a happy vaper
Remember, keeping your vape kit clean and well-maintained is essential for getting the most out of your device. Cleaning your tank regularly not only prevents any build-up of residue but also helps to keep it running at peak performance. And if you do experience any common issues like leaking, flooded tanks or a burnt taste then we hope these tips will help get your vape kit back in action!